How to distribute a screensaver on macOS in 2024 ⚙️
This post was inspired by my recent experience distributing a macOS screensaver with Xcode and running into GateKeeper and other signing issues.

Since 2020, Apple has required developers to sign and notarize macOS applications in order to distribute them.
I recently built a macOS screensaver (to help with learning Mandarin) and found that the process of distributing it was more complicated than I expected.
I've compiled the steps below that worked for me. I hope this helps someone!
Link to this headingPre-requisities
- An Apple Developer account
- A Mac with a recent version of Xcode installed
- A screensaver project (or any other unconventional app, like a command-line tool) that you want to distribute as a zip file
- if you're still learning how to create a Mac screensaver, check out my GitHub repo for my screensaver for inspiration
Link to this heading1. Create a Developer ID Application certificate
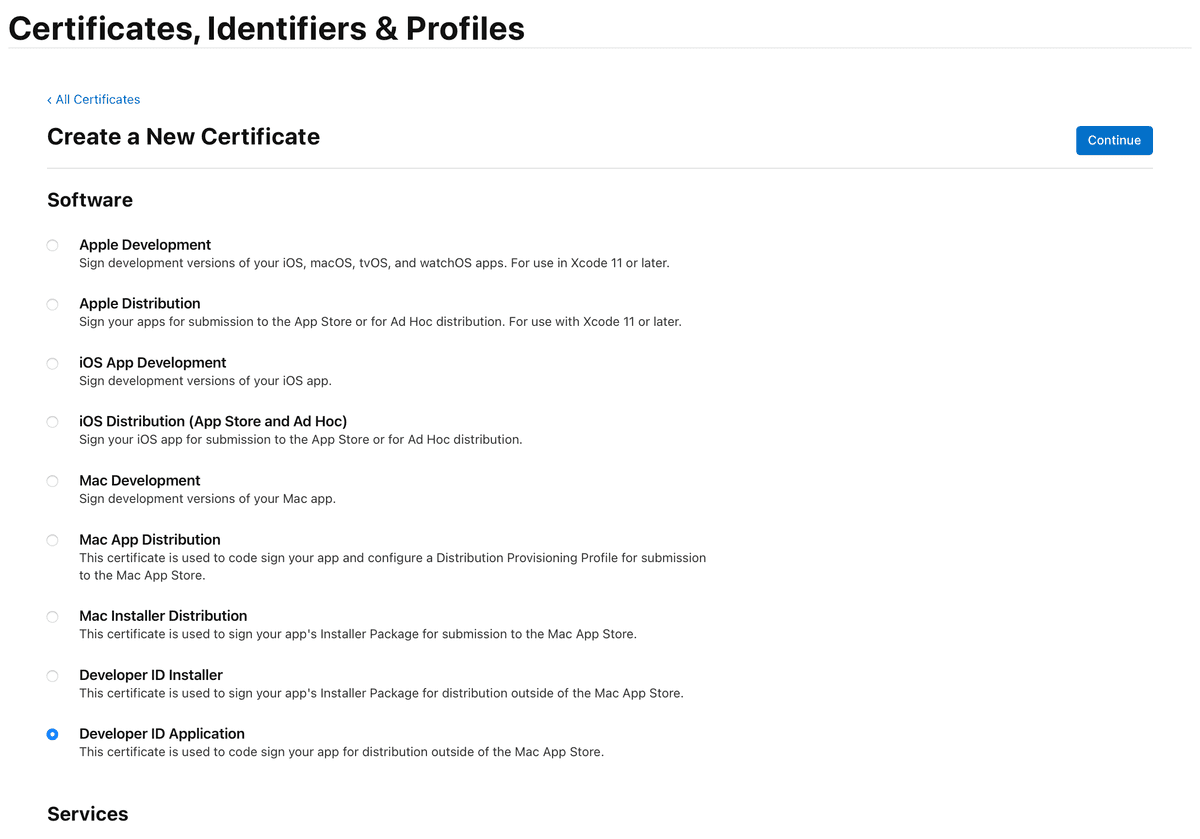
Per the instructions from Apple, you'll need to create a Developer ID Application certificate by logging into the developer site, navigating to Certificates, and creating a new Developer ID Application certificate.
After clicking Continue, you'll be prompted with a few steps that culminate in you downloading a certificate file to add to Keychain Access.
Link to this heading2. Update your Xcode project's code signing settings
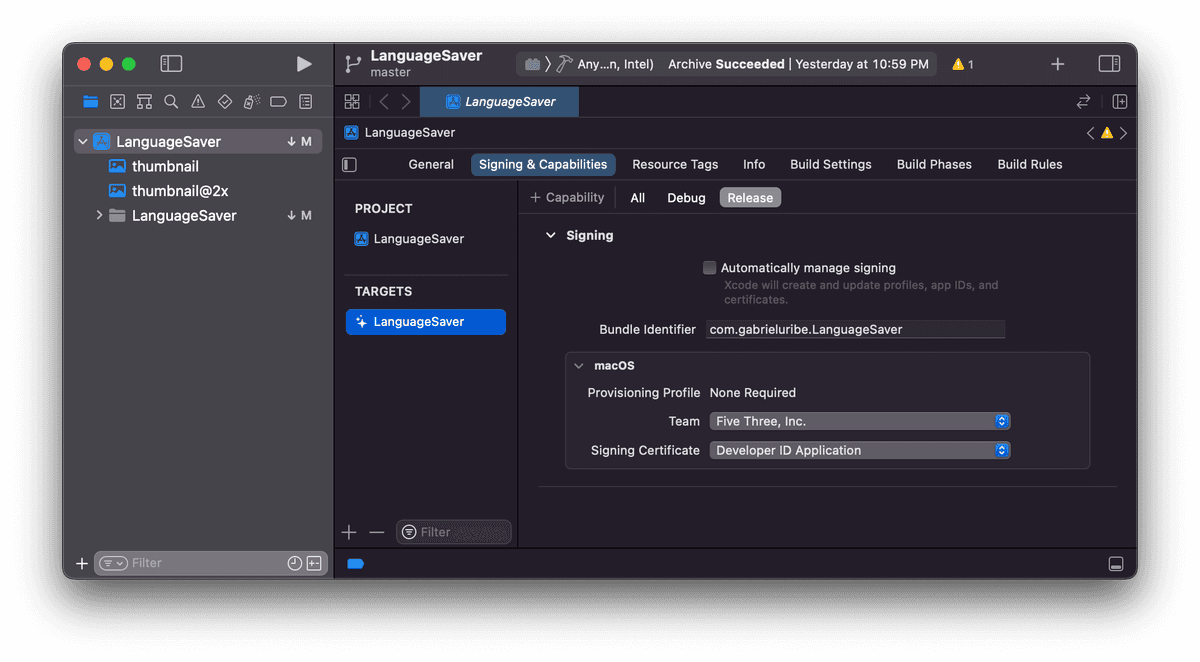
Now in Xcode, first select your project in the Project Navigator, then select the target in the Project Editor, and lastly in the Signing & Capabilities tab, select the Release tab and select your Team. For the Signing Certificate dropdown, select the Developer ID Application certificate.
For some reason, I had to uncheck Automatically manage signing in order to have access to the Developer ID Application certificate option in the Signing Certificate dropdown.
Link to this heading3. Archive and export your project
In Xcode again, select Product > Archive to archive your project. This will launch the Organizer window, where you can select your archive and click Distribute Content.
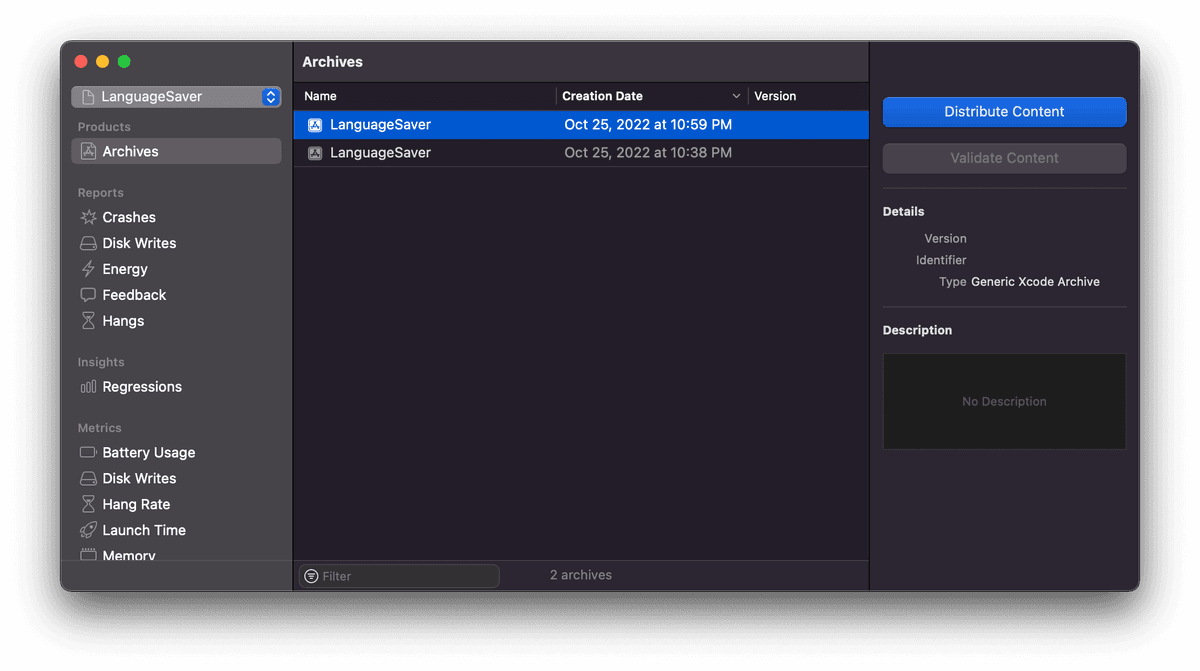
You'll want to select Built Products to export the archive's built products, and finally you'll be prompted to select an export location for the product directory.
If you navigate within that exported product directory, you'll find the screen saver's .saver file that we'll soon have ready for distribution.
Before moving onto the final step, compress the .saver file into a .zip as we'll be notarizing the .zip file.
Link to this heading4. Notarize your screensaver
As a final step, you have to notarize your application so that others can run it without macOS's GateKeeper blocking it.
To do this, you'll need to create an App-specific password in your Apple ID account settings at https://idmsa.apple.com. We'll be using this password to authenticate with Apple's notarization service.
With that zip file created in the previous step, run the following command in your terminal from the same directory as your .zip file:
(NOTE: use notarytool instead of altool if you're on macOS Ventura or later)
xcrun notarytool submit "<name_of_app_zip_file>" --apple-id "<apple_id>" --team-id "<your_team_id>" --password "<app-specific-password>" --verbose --wait
Previously, you would use altool to notarize your application, like so:
xcrun altool --notarize-app --primary-bundle-id "<your_app_bundle_id>" -u "<apple_id>" -p "<app-specific-password>" -t osx -f <name_of_app_zip_file>
Link to this heading5. Distribution
Now you're all set for distribution!
You should be able to host or send the zip file as needed, and others shouldn't run into issues running your screensaver application.
Thanks for reading!
Last Updated: Mon Nov 04 2024